Doll Dexcom Sensor
 von bocaccio


Druckbare Dateien (2)
-
 stl
stlDoll_Dex_Sensor_Base.stl
304 Ko · 817 Downloads
-
 stl
stlDoll_Dex_Sensor_Top.stl
178 Ko · 830 Downloads
Beschreibung
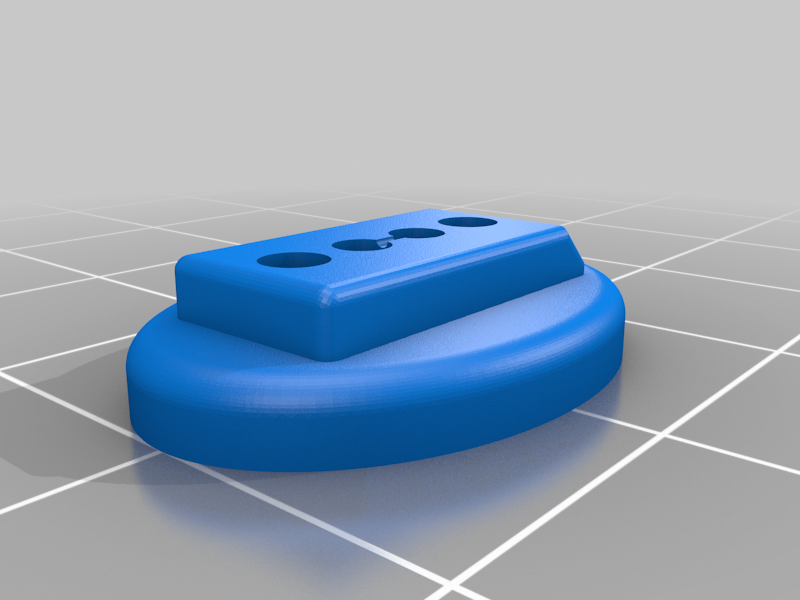
My 7 year old niece has Type I diabetes. She currently uses a Dexcom sensor to monitor her sugars. My sister saw a picture of a doll-sized sensor someone had made and asked if I could design something for my niece. I was happy to oblige.
This is a two-part print. The base is a button that can be sewn onto the arm of a doll (e.g., American Girl, Elf on the Shelf, etc). The top is the "battery." I added magnets and printed the tops in different colors so she can change them out.
Magnets:
The holes are sized for 2x1mm magnets. These are the one's I used.
https://www.amazon.com/gp/product/B07BHF3X86/ref=oh_aui_search_detailpage?ie=UTF8&psc=1
To add the magnets to the base, I used the following steps.
- get a stack of 10-15 magnets (something you can hold onto easily)
- add a drop of superglue to each of the holes (not the button holes)
- push one magnet into ahole and slide the rest to the side.
- using the same orientation for the stack, repeat Step 3 for the other hole. This will make the polarity the same for both magnets in the base.
To add the magnets to the tops, I used the following steps.
- get a stack of 10-15 magnets (something you can hold onto easily)
- check the polarity with the magnets in the base. You want the base and stack to repel each other.
3a. If you print the top with the holes on the build plate, the magnets can be pressed in without glue.
3b. If you print the top with the holes up, the magnets will require some glue. Add a drop to each hole. - push one magnet into the hole and slide the rest to the side.
- using the same orientation for the stack, repeat Step 4 for the other hole. This will make the polarity the same for both magnets in the top.